
Roof Replacement Process
Even the best quality roof will start to fail when the roofing materials reach the end of their expected lifespan. Most roofing materials only come with a ten to twenty year guarantee on average. After this period ends, no amount of repairs will restore the function and beauty of your roof. Luckily, at that point, you can have our roofing professionals demo and rebuild your roof. Here’s what to expect.
Inspection
An inspection gives us the chance to note problem areas which may require immediate attention. We carefully consider the shape, size and pitch of your roof to determine the best material options for your unique build. The inspection may include a thorough look at the attic to ensure the ventilation components remain in good shape. Throughout the inspection, your roofer considers your preferences concerning both appearance and cost.
Bid Creation
We always spell out our findings by writing up a bid for each customer. The bid creation process includes the information gathered from the inspection and further research about material cost and availability. We will give you a timeline on job completion for each material type, depending on availability in your area. Make sure to carefully read through the bid information before signing the bottom to authorize the project.
Tear Off
After confirming the bid and ordering materials, your roofers will immediately start on the tear off process. If the roof sheathing remains in good condition, we can just remove and replace the vapor barrier, shingles, ridge cap and flashing. Extremely old, worn or damaged roofs, however, often require a full tear off to the trusses or beyond. During this process, our roofers always dispose of all the old materials to leave the jobsite clean and tidy.
Install
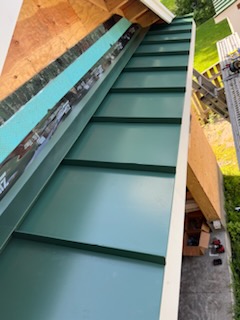
The installation of the new materials begins with the lower support materials. On full roof rebuilds, we measure, cut and secure the sheathing materials to create the main foundation for your roof. From there, it’s just a matter of covering the entire structure in shingles from the eaves to the ridge. Metal finish materials, such as the ridge cap and flashings, go on last to complete your build.
Final Inspection
After a thorough cleanup of the site, we always go through a final inspection alongside our customers. We will discuss our guarantee.
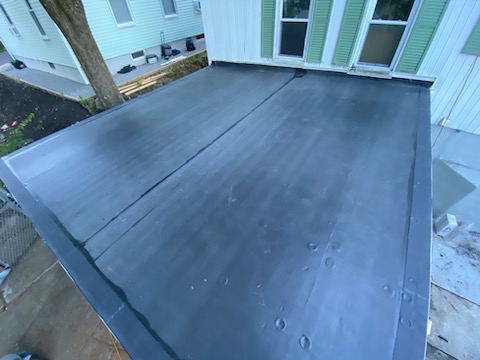
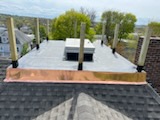
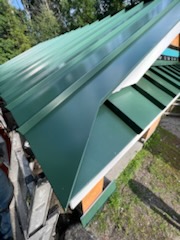
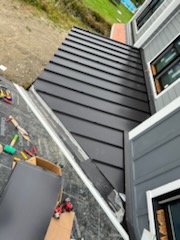
Rubber Roofing & Metal Roofing
Cochrane roofing installs both rubber and Metal Roofing as well as traditional shingle roofs.

Cochrane provides comprehensive roof inspections, maintenance, gutter installs and full rebuilds for commercial buildings of all kinds. Maintenance tasks and gutter installs protect the life of your roof to extend the time between full rebuilds.
We can help you create an appropriate schedule for these important tasks. When you eventually need a full rebuild performed, our team will work with you to identify and create your vision of the perfect roof structure.
Material Selections
We always use the highest quality materials selected for their durability and appearance. Common materials used for commercial jobs include metal, synthetic rubber, thermoplastic PCV, single ply membrane and TPO. In addition to the material warranties offered with these products, we guarantee all of the work we perform throughout the expected life of your roof.

Among the various components constituting your home’s exterior, siding is often the most overlooked. Many homeowners perceive siding as primarily an aesthetic feature, yet its significance extends far beyond mere decoration. Siding plays a crucial role in enhancing your property’s value and offers additional protection against the severe weather conditions typical of New England. Furthermore, when installed correctly, siding contributes to the energy efficiency of your home, leading to reduced energy expenses each month.

How do I protect my home against ice dams?
Ice dams are formed when heat from the inside of a home escapes into the attic and warms the roof decking during the winter. This heat, combined with heat from the sun, can melt snow on the roof. Melting snow then runs down toward the eaves as water. When it reaches the cold eaves and gutters it refreezes. This continual thaw and re-freeze process creates ice dams. The result is water backing up under the roof shingles where it can soak through the roof decking or wall sheathing, causing damage to attics, ceilings and walls.
There are three ways to defend against the damage ice dams cause: attic insulation, attic ventilation system, and a water-proofing shingle underlayment (such as CertainTeed WinterGuard™). All three work together. Insulation keeps heat from escaping from your home’s living space into your attic. Ventilation removes the heat and helps keep the roof deck evenly cool to help prevent snow from melting on the roof. Finally, waterproffing shingle underlayment is laid across the roof before roof shingles are applied. One of the reasons we recommend WinterGuard is that it is warranted against leaks from dams that do form on the roof.
Roof Vents

Understanding The Purpose Of Roof Vents
The roof vents allow for moisture dissipation, temperature control and airflow through the attic and roof deck. The vents serve a variety of purposes depending on the build of your home and local climate characteristics. As roofing professionals, we must properly assemble and maintain the vents to ensure they provide the expected benefits to our customers. Otherwise, the home could suffer from energy loss from inefficient cooling or heating, roof damage from ice dams or trapped humidity and mold or rot of the existing materials.
Roof Venting Assessment
The roof vents start in the attic where the insulation traps heat and humidity from the living space in your home. Roofers must inspect the insulation and common leak points, like the access hatch and light surrounds, to assess fluctuations in that space. The amount of expected airflow leakage in the attic helps determine the size and location of the vents. Roofers must also consider the building codes in your area to determine if your roof requires venting. If so, the required vents need to go in to ensure your build passes inspection.
Installation of Roof Vents
The roof vents often exit out right below the ridge cap on the tallest part of the roof. In many cases, the vent chute should sit at least two inches deep or meet the given code requirements. To better channel the air and humidity out of the vents, the gaps between the rafters require a layer of closed cell foam. Alternatively, it’s possible to extend the edges of the rafters to make room for more fiberglass insulation.
